Categories
Posts in this category
- Automating Deployments: A New Year and a Plan
- Automating Deployments: Why bother?
- Automating Deployments: Simplistic Deployment with Git and Bash
- Automating Deployments: Building Debian Packages
- Automating Deployments: Debian Packaging for an Example Project
- Automating Deployments: Distributing Debian Packages with Aptly
- Automating Deployments: Installing Packages
- Automating Deployments: 3+ Environments
- Architecture of a Deployment System
- Introducing Go Continuous Delivery
- Technology for automating deployments: the agony of choice
- Automating Deployments: New Website, Community
- Continuous Delivery for Libraries?
- Managing State in a Continuous Delivery Pipeline
- Automating Deployments: Building in the Pipeline
- Automating Deployments: Version Recycling Considered Harmful
- Automating Deployments: Stage 2: Uploading
- Automating Deployments: Installation in the Pipeline
- Automating Deployments: Pipeline Templates in GoCD
- Automatically Deploying Specific Versions
- Story Time: Rollbacks Saved the Day
- Automated Deployments: Unit Testing
- Automating Deployments: Smoke Testing and Rolling Upgrades
- Automating Deployments and Configuration Management
- Ansible: A Primer
- Continuous Delivery and Security
- Continuous Delivery on your Laptop
- Moritz on Continuous Discussions (#c9d9)
- Git Flow vs. Continuous Delivery
Thu, 28 Jan 2016
Introducing Go Continuous Delivery
Permanent link
Go Continuous Delivery (short GoCD or simply Go) is an open source tool that controls an automated build or deployment process.
It consists of a server component that holds the pipeline configuration, polls source code repositories for changes, schedules and distributes work, collects artifacts, and presents a web interface to visualize and control it all, and offers a mechanism for manual approval of steps. One or more agents can connect to the server, and carry out the actual jobs in the build pipeline.
Pipeline Organization
Every build, deployment or test jobs that GoCD executes must be part of a pipeline. A pipeline consists of one or more linearly arranged stages. Within a stage, jobs run potentially in parallel, and are individually distributed to agents. Tasks are again linearly executed within a job. The most general task is the execution of an external program. Other tasks include the retrieval of artifacts, or specialized things such as running a Maven build.
Matching of Jobs to Agents
When an agent is idle, it polls the server for work. If the server has jobs to run, it uses two criteria to decide if the agent is fit for carrying out the job: environments and resources.
Each job is part of a pipeline, and a pipeline is part of an environment. On the other hand, each agent is configured to be part of one or more environments. An agent only accepts jobs from pipelines from one of its environments.
Resources are user-defined labels that describe what an agent has to offer,
and inside a pipeline configuration, you can specify what resources a job
needs. For example you can define that job requires the phantomjs resource
to test a web application, then only agents that you assign this resource will
execute that job. It is also a good idea to add the operating system and
version as a resources. In the example above, the agent might have the
phantomjs, debian and debian-jessie resources, offering the author of
the job some choice of granularity for specifying the required operating
system.
Installing the Go Server on Debian
To install the Go server on a Debian or Debian-based operating system, first you have to make sure you can download Debian packages via HTTPS:
$ apt-get install -y apt-transport-https
Then you need to configure the package sourcs:
$ echo 'deb http://dl.bintray.com/gocd/gocd-deb/ /' > /etc/apt/sources.list.d/gocd.list
$ curl https://bintray.com/user/downloadSubjectPublicKey?username=gocd | apt-key add -
And finally install it:
$ apt-get update && apt-get install -y go-server
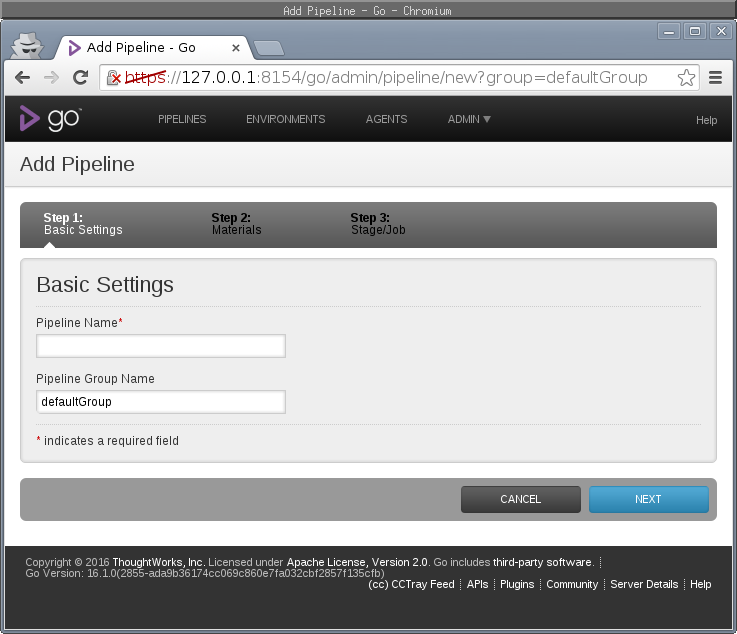
When you now point your browser at port 8154 of the go server for HTTPS (ignore the SSL security warnings) or port 8153 for HTTP, you should see to go server's web interface:

To prevent unauthenticated access, create a password file (you need to have
the apache2-utils package installed to have the htpasswd command
available) on the command line:
$ htpasswd -c -s /etc/go-server-passwd go-admin
New password:
Re-type new password:
Adding password for user go-admin
$ chown go: /etc/go-server-passwd
$ chmod 600 /etc/go-server-passwd
In the go web interface, click on the Admin menu and then "Server
Configuration". In the "User Management", enter the path /etc/go-server-passwd
in the field "Password File Path" and click on "Save" at the bottom of the
form.
Immediately afterwards, the go server asks you for username and password.
You can also use LDAP or Active Directory for authentication.
Installing a Go Worker on Debian
On one or more servers where you want to execute the automated build and deployment steps, you need to install a go agent, which will connect to the server and poll it for work. On each server, you need to do the first same three steps as when installing the server, to ensure that you can install packages from the go package repository. And then, of course, install the go agent:
$ apt-get install -y apt-transport-https
$ echo 'deb http://dl.bintray.com/gocd/gocd-deb/ /' > /etc/apt/sources.list.d/gocd.list
$ curl https://bintray.com/user/downloadSubjectPublicKey?username=gocd | apt-key add -
$ apt-get update && apt-get install -y go-agent
Then edit the file /etd/default/go-agent. The first line should read
GO_SERVER=127.0.0.1
Change the right-hand side to the hostname or IP address of your go server, and then start the agent:
$ service go-agent start
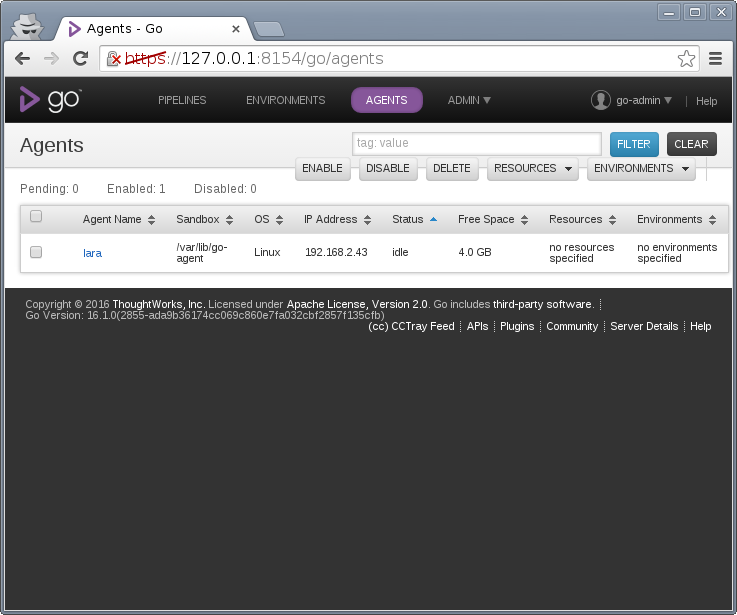
After a few seconds, the agent has contacted the server, and when you click on the "Agents" menu in the server's web frontend, you should see the agent:

("lara" is the host name of the agent here).
A Word on Environments
Go makes it possible to run agents in specific environments, and for example run a go agent on each testing and on each production machine, and use the matching of pipelines to agent environments to ensure that for example an installation step happens on the right machine in the right environment. If you go with this model, you can also use Go to copy the build artifacts to the machines where they are needed.
I chose not to do this, because I didn't want to have to install a go agent on each machine that I want to deploy to. Instead I use Ansible, executed on a Go worker, to control all machines in an environment. This requires managing the SSH keys that Ansible uses, and distributing packages through a Debian repository. But since Debian seems to require a repository anyway to be able to resolve dependencies, this is not much of an extra hurdle.
So don't be surprised when the example project here only uses a single
environment in Go, which I call Control.
First Contact with Go's XML Configuration
There are two ways to configure your Go server: through the web interface, and through a configuration file in XML. You can also edit the XML config through the web interface.
While the web interface is a good way to explore go's capabilities, it quickly becomes annoying to use due to too much clicking. Using an editor with good XML support get things done much faster, and it lends itself better to compact explanation, so that's the route I'm going here.
In the Admin menu, the "Config XML" item lets you see and edit the server config. This is what a pristine XML config looks like, with one agent already registered:
<?xml version="1.0" encoding="utf-8"?>
<cruise xmlns:xsi="http://www.w3.org/2001/XMLSchema-instance" xsi:noNamespaceSchemaLocation="cruise-config.xsd" schemaVersion="77">
<server artifactsdir="artifacts" commandRepositoryLocation="default" serverId="b2ce4653-b333-4b74-8ee6-8670be479df9">
    <security>
    <passwordFile path="/etc/go-server-passwd" />
    </security>
</server>
<agents>
    <agent hostname="lara" ipaddress="192.168.2.43" uuid="19e70088-927f-49cc-980f-2b1002048e09" />
</agents>
</cruise>
The ServerId and the data of the agent will differ in your installation, even if you followed the same steps.
To create an environment and put the agent in, add the following section
somewhere within <cruise>...</cruise>:
<environments>
    <environment name="Control">
    <agents>
        <physical uuid="19e70088-927f-49cc-980f-2b1002048e09" />
    </agents>
    </environment>
</environments>
(The agent UUID must be that of your agent, not of mine).
To give the agent some resources, you can change the <agent .../> tag in the
<agents> section to read:
<agent hostname="lara" ipaddress="192.168.2.43" uuid="19e70088-927f-49cc-980f-2b1002048e09">
  <resources>
    <resource>debian-jessie</resource>
    <resource>build</resource>
    <resource>debian-repository</resource>
  </resources>
</agent>
Creating an SSH key
It is convenient for Go to have an SSH key without password, to be able to clone git repositories via SSH, for example.
To create one, run the following commands on the server:
$ su - go $ ssh-keygen -t rsa -b 2048 -N '' -f ~/.ssh/id_rsa
And either copy the resulting .ssh directory and the files therein onto each
agent into the /var/go directory (and remember to set owner and permissions
as they were created originally), or create a new key pair on each agent.
Ready to Go
Now that the server and an agent has some basic configuration, it is ready for its first pipeline configuration. Which we'll get to soon :-).
I'm writing a book on automating deployments. If this topic interests you, please sign up for the Automating Deployments newsletter. It will keep you informed about automating and continuous deployments. It also helps me to gauge interest in this project, and your feedback can shape the course it takes.